Since there is enough threads out there on different lighting setups and what not I figured I'd just add what I did to my build thread instead.
First off, there are a couple threads you should go through if you want to do a proper install. XJ-Terra did a fantastic job on this thread:
http://www.thenewx.org/forum/showthread.php?t=37578&highlight=How-to%3A+roof+lightsAnd then you have his collection of pretty much ALL useful threads on the lighting subject:
http://www.thenewx.org/forum/showthread.php?t=12860So, with those two sources, here is what I did:
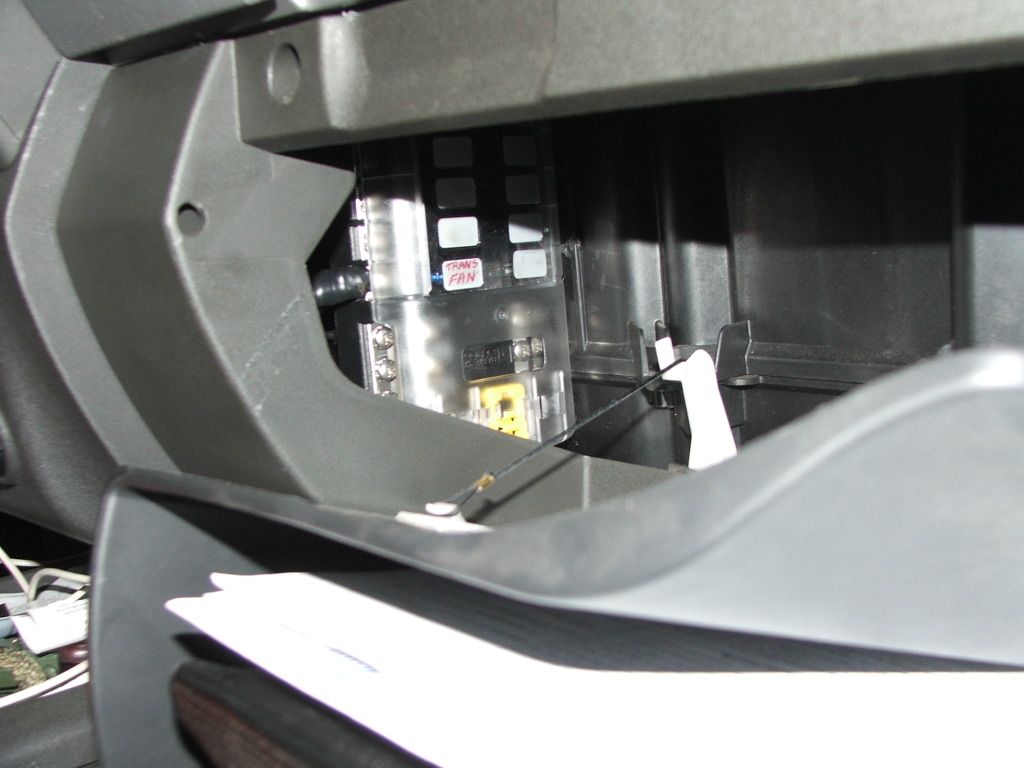
BLUE SEA:A while back I installed a blue sea fuse block behind the glove box. I was starting to collect wires coming through the engine bay and it was getting hard to keep everything neat and clean looking. I literally followed XJ-Terra's lead exactly on this install as I didn't see any reason to try and improve on something that looked great to me.
I bought an amp install kit as I had free time on weekend and really wanted to get it done that day but you can save a bit of money by buying a kit like this
http://www.amazon.com/Lanzar-LQ44-Contaq-Gauge-In-Line/dp/B0007L8ANQ/ref=wl_it_dp_o_pdT1_nS_nC?ie=UTF8&colid=29L53CBWSTTTU&coliid=I3C21H2D0BJQOPDIAGRAMS:Once I had the blue sea fuse block installed I set about figuring out how I wanted to set everything up. There is a site (
http://www.circuitlab.com) that is actually fairly decent for drawing out a diagram if you feel so inclined.
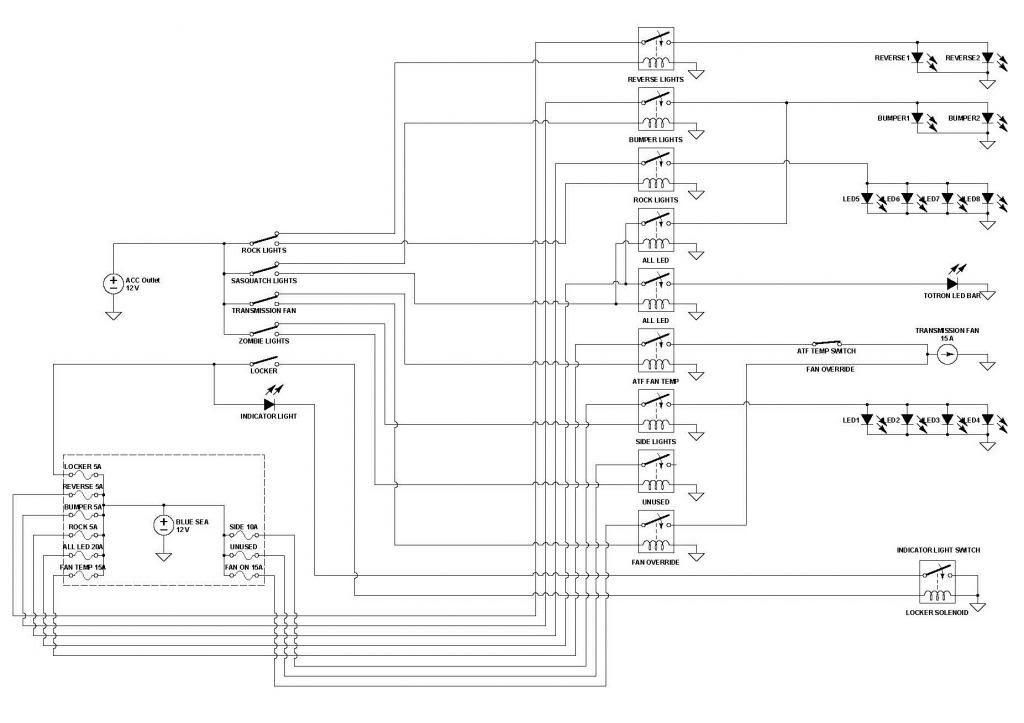
Here is what I came up with. I decided what I wanted to run and how I wanted to do it. You'll notice that it displays the switches as ON/ON but my switches are actually ON/OFF/ON (SPDT). I realize I can still only run 4 accessories at a time but that is fine. Just take the time to figure out which switch you want to run what accessory so you never find yourself in a situation where you can't turn on the item you need without shutting another one off.
The other thing I did was re-wire my transmission fan. I have an aftermarket cooler with a built in fan that runs through a temperature switch in the cooler. So, I leave the switch in the first ON position at all times as it feeds power to the temp switch. If the temps reach around 185 degrees the switch closes and the fan turns on. I had found, after a few wheeling trips, that I wanted an override so that at certain times I could just manually turn the fan on. I installed a second circuit which bypasses the temp switch and now the fan is controlled by one of the SPDT switches where up leaves it on constantly and down lets the temp switch control it.
 SWITCHES:
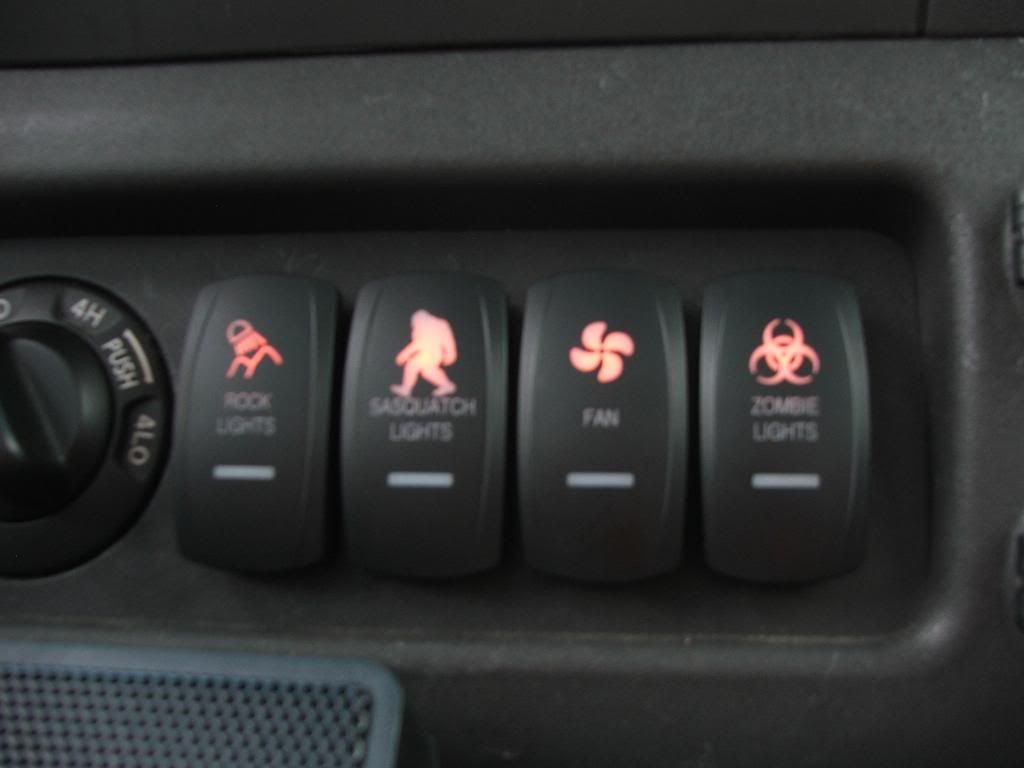
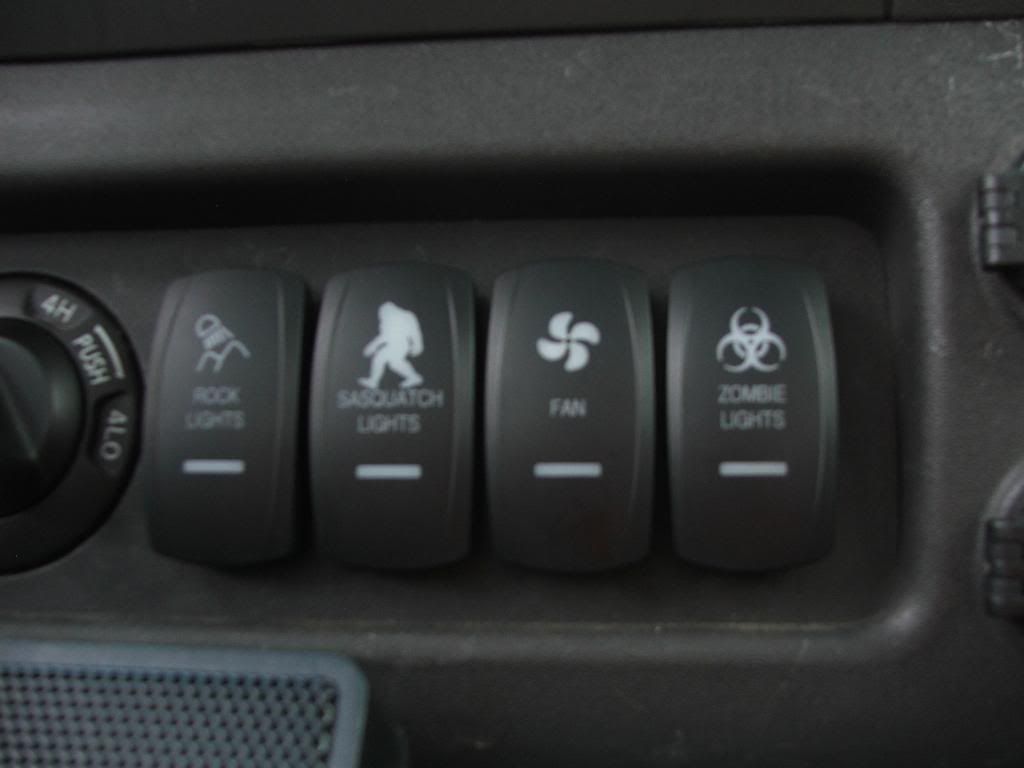
My next diagram was for the switches. The switches are fairly simple but because I had a specific idea in mind I wanted to draw it out. I wanted the ROCK/REVERSE lights switch to be able to come on even with the truck off so I brought its power directly from the always on ACC outlet (For this switch, I could have completely skipped the relays and run it off the Blue Sea as it's a 12V/20A switch). The only reason the one switch has constant power is I wanted to be able to use the reverse lights as a way of lighting up a camp site etc etc. For my other switches I had to use relays for everything because I wanted everything to shut off with the keys. My switches draw power from the keyed ACC outlet so when the key shuts off so does everything else.
So, here is what each Pin number is:
Pin 1: Outgoing to accessory
Pin 2: Incoming from source
Pin 3: Outgoing to accessory
Pin 7: Upper light ground
Pin 8: Upper light positive
Pin 9: Lower light ground
Pin10: Lower light positive
I had planned on tapping the dimmer circuit but opted not to during the install. I tried it out (hazard lights would be very easy to tap into) but because of the way I wired my switches it would have bothered me to dim the light even with a switch turned on.
Here is the diagram. Basically, as you can see, the upper lights will come on with my dash/marker lights. The caveat to that (and the reason you see extra diodes) is that even if all my dash lights are off, I have jumpers set up so if the switch is turned on each individual light will still come on.
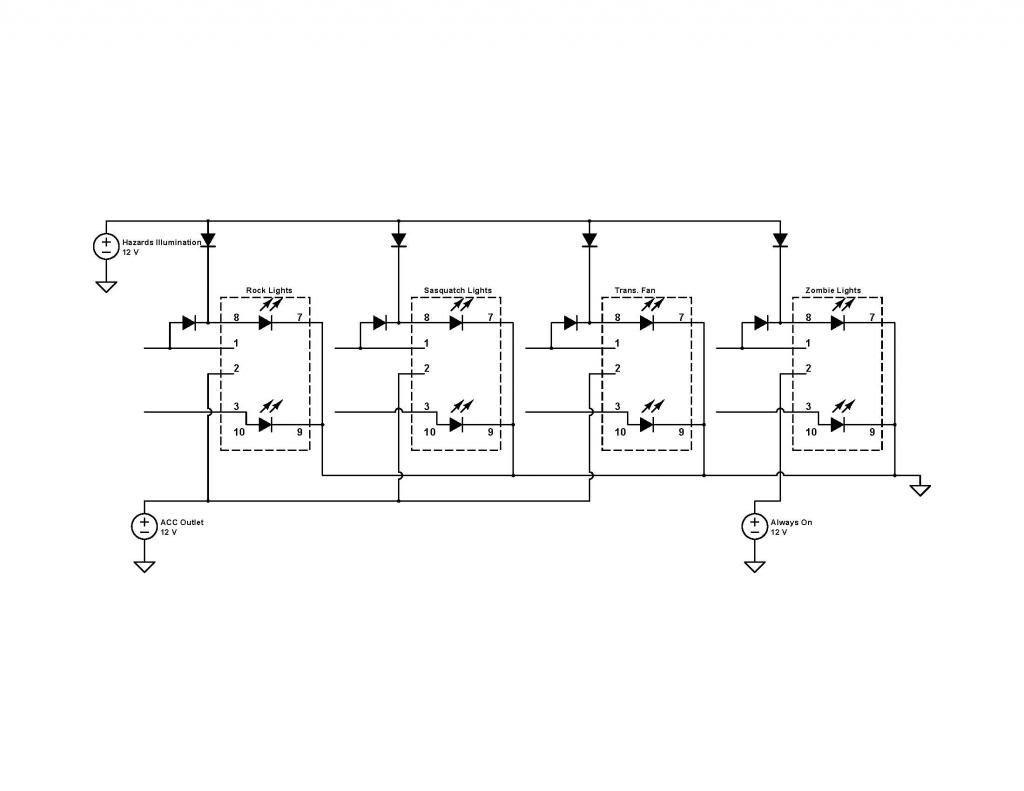
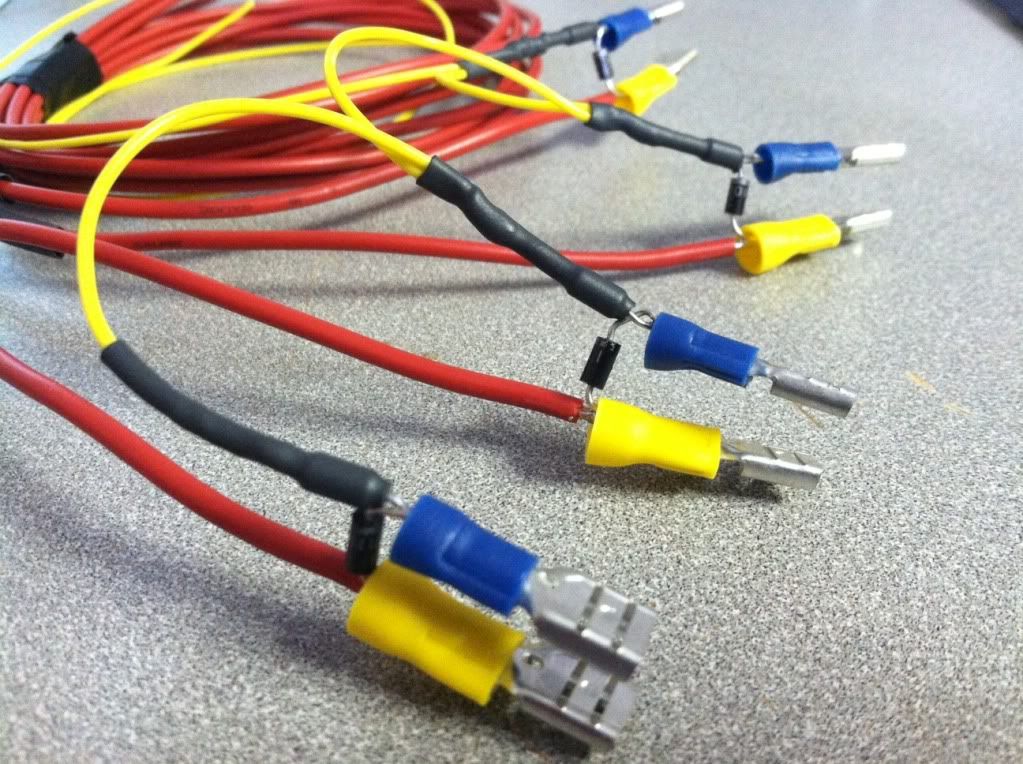
Pictures of the diodes you see in the diagram. Everything is actually soldered and not just crimped in there.
with dash lights on
 RELAYS:
First off, for many people, you DO NOT need relays. I'm pretty sure there are a few people that are bothered that I actually relayed everything but hey, I had a plan and I'm good with it. Most of OTRATTW's switches are 12V/20A switches so unless your drawing 20+ amps you don't need relays you can just go through the switch. Because I powered my switches from the keyed source though, I needed relays.
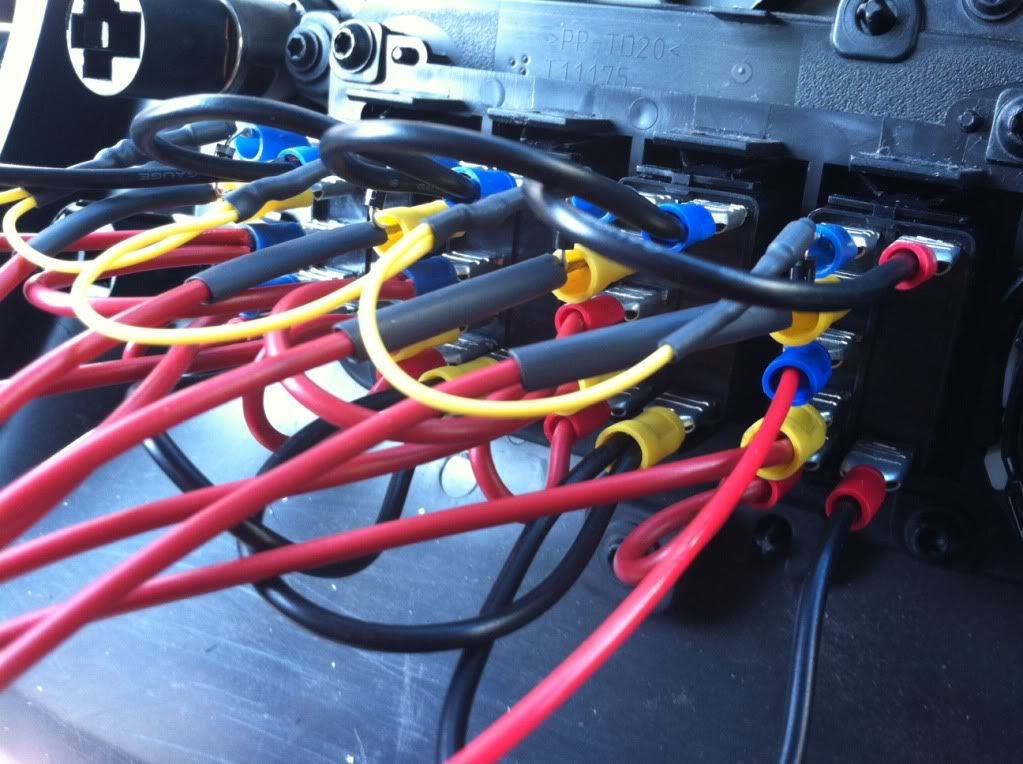
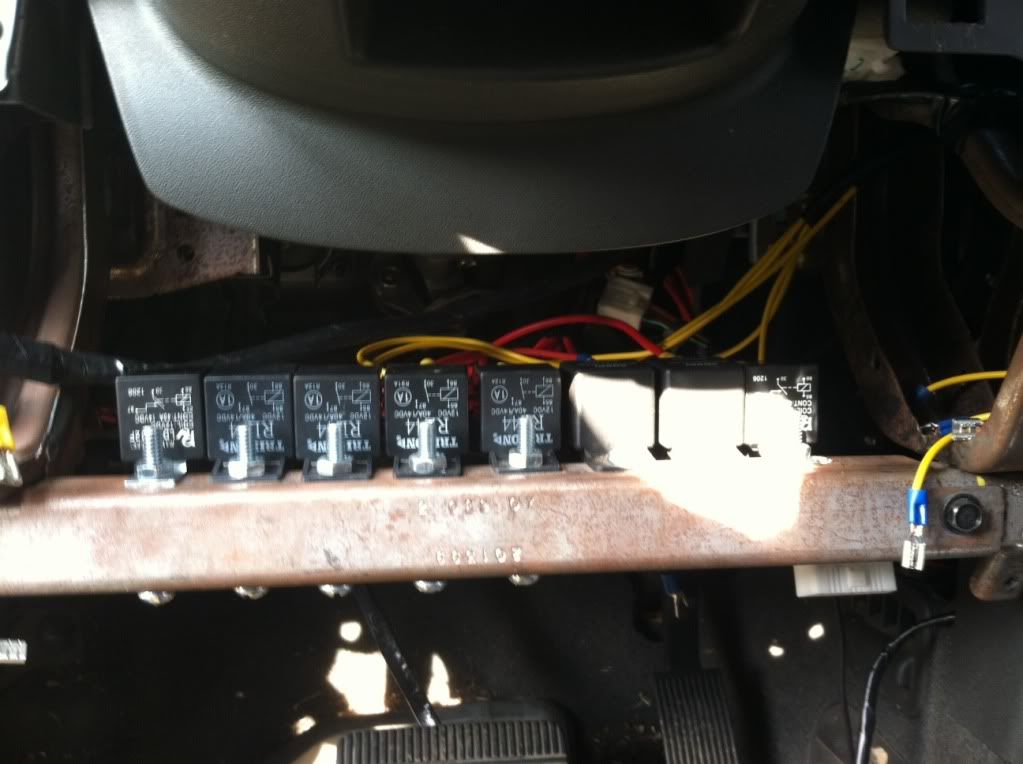
Here is where I put all my relays. This is much cleaner than it looks in this picture. This was mid install so wires were everywhere. There is plenty of room under here so if you go this route, get all the wiring run and then divide each bundle (incoming to relays/ outgoing/ switch incoming etc) into it's own bundle and use wire loom or something of your choice to clean it all up and I just ziptied everything in place after that.
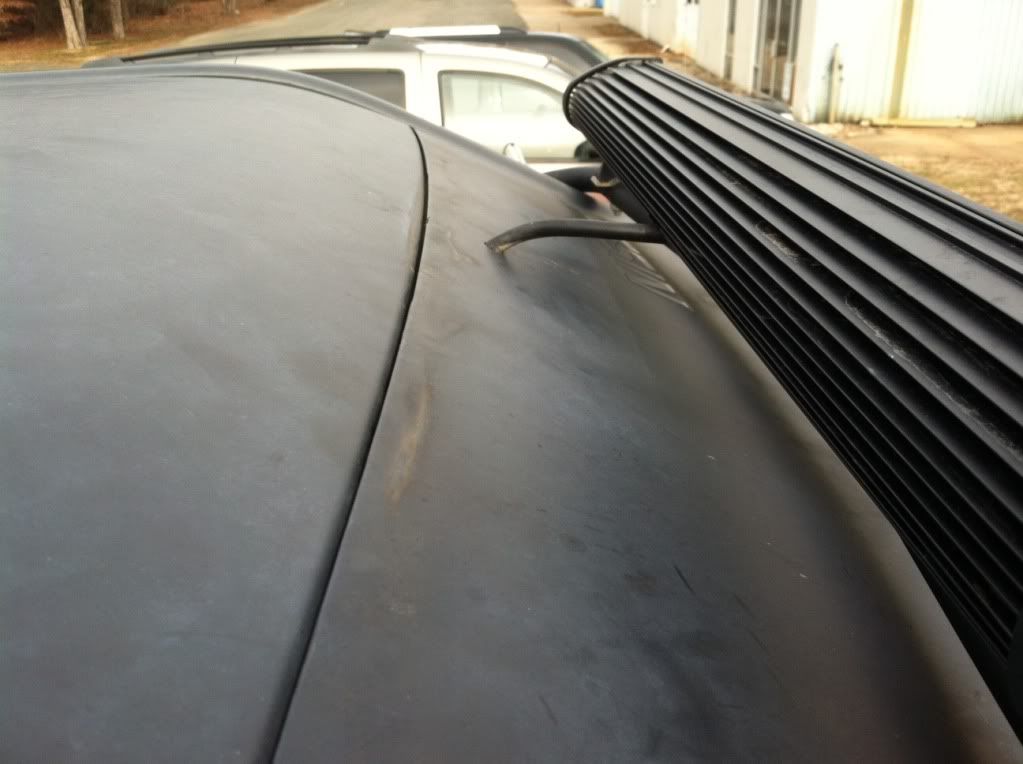
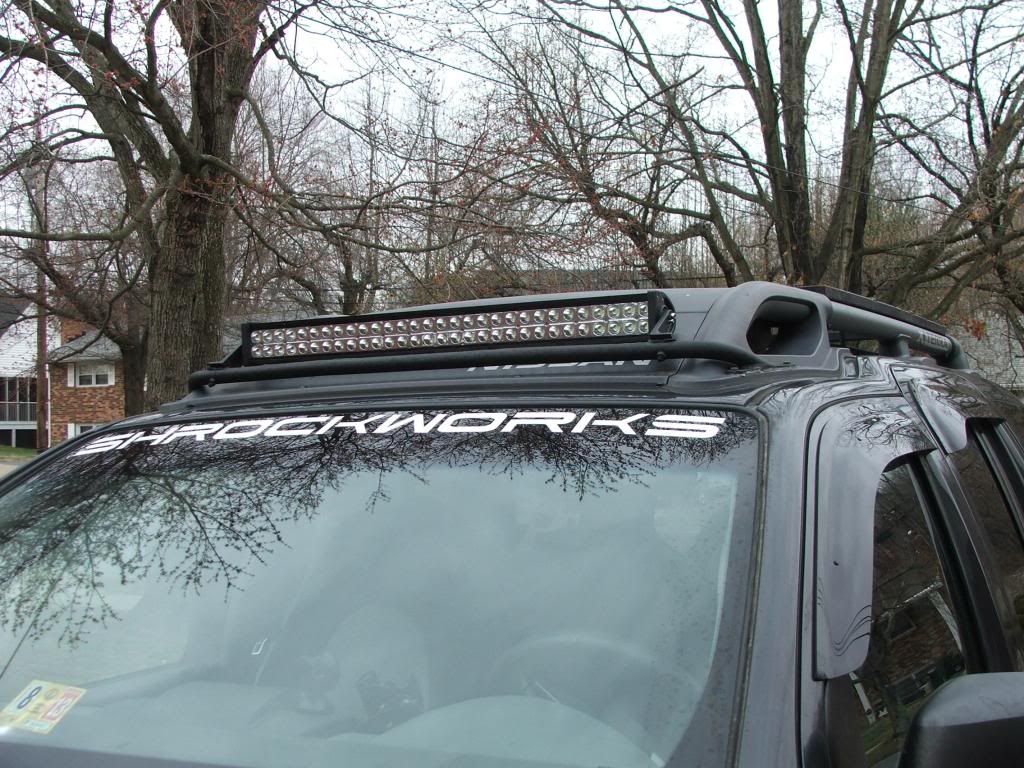
 ROOF LIGHT:
Alright, once all that was figured out I started installing everything. I actually had the blue sea and the roof/bumper lights installed several months ago but just this weekend got around to doing the rock lights.
So, for the roof lights here are some of the key things i used:
Cord grips for going through the roof:
http://www.amazon.com/gp/product/B001BPV9TY/ref=oh_details_o01_s00_i00?ie=UTF8&psc=1Wire to use with the cord grip:
Will get a link for this eventually but it's basically two wires insulated together into one thick wire so the cord grip can seal around it. (see pictures)


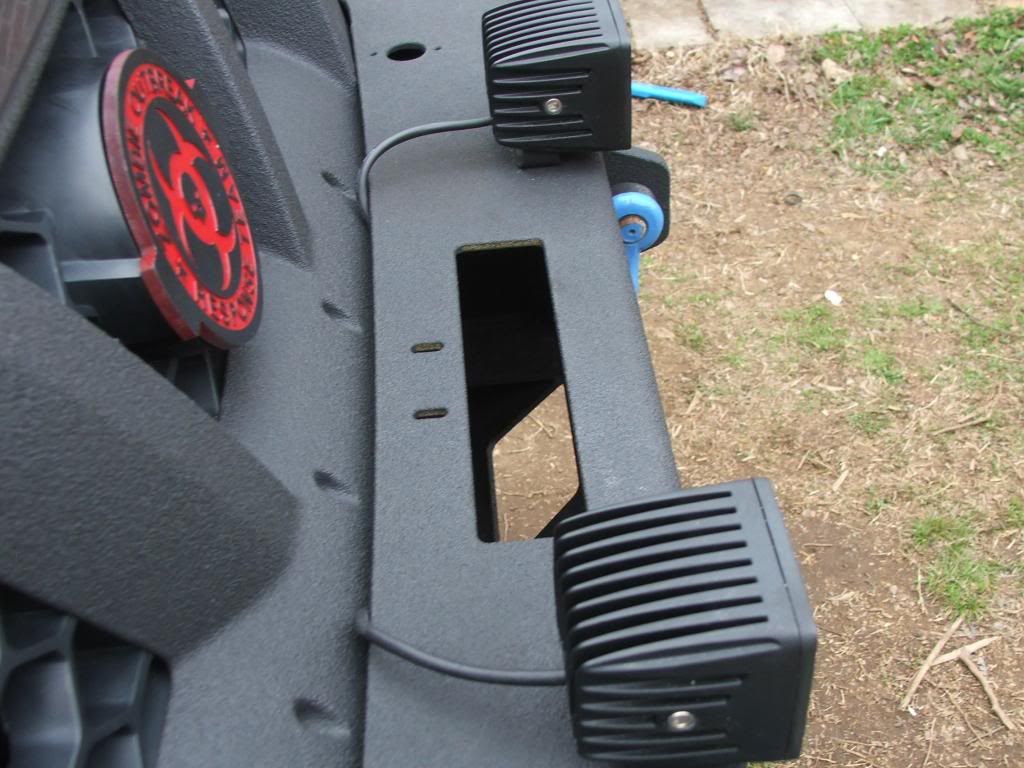
 BUMPER LIGHTS:
The bumper lights were pretty simple. I ran the wire from the relay straight out into the engine bay. I kept it tucked down under everything and inside of wire loom but the exact route is up to you. Once I go out to right behind the grill I installed some quick disconnects. I bolted the lights on the bumper and that was pretty much it.
 ROCK LIGHTS:
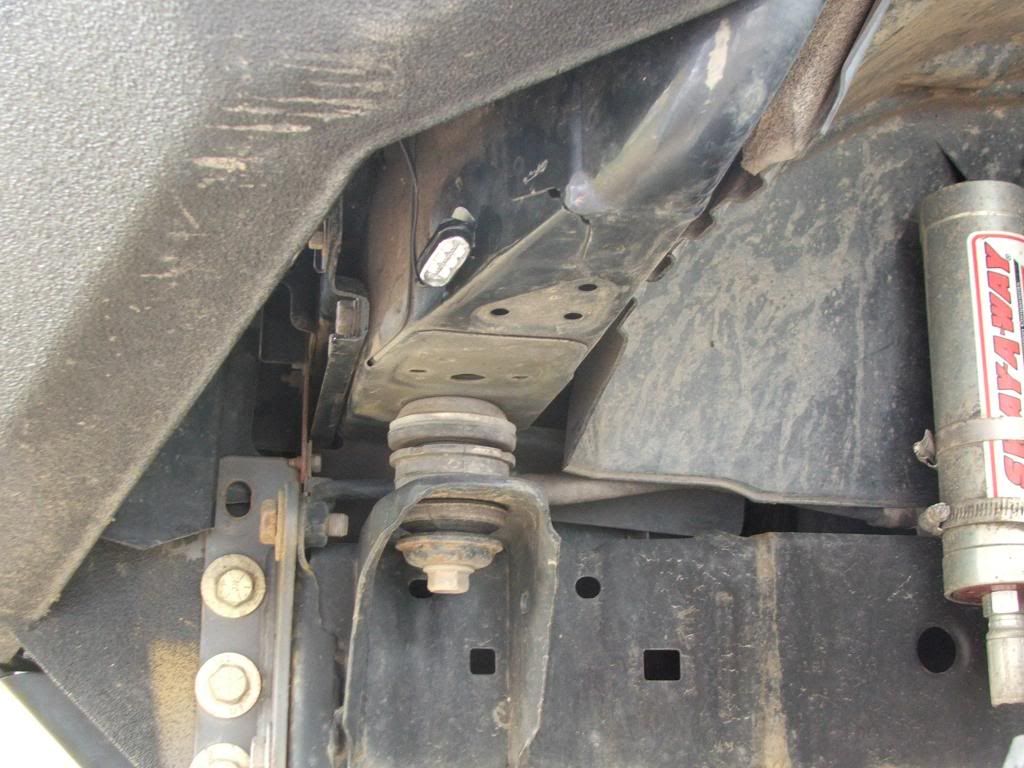
Now, for the rock lights, I tossed a lot of ideas around on this before deciding what I wanted to use. In the time that I have been wheeling this truck I've had it offroad at night 3 times. Only ONE of those times did I truly need rock lights and wish that I had them. So, this particular project was more about me entertaining myself than anything else. With that in mind my goal was to minimize the cost of everything.
Here is what is installed right now:
These are not great quality and would not buy them again. I will test them and see how long they last but were I to do it over again I would use the little rubberized LED strips that I have inside the wheel wells.http://www.amazon.com/gp/product/B005CSVPK4/ref=oh_details_o02_s00_i00?ie=UTF8&psc=1These are both on order:These ones will go inside the shrock bumper. If you look just above the radiator skid there is two large holes. These will not sit directly in the hole but actually to one side (bolts to hold rad skid on are right to the side of each hole) The point of this is I did not want them shining in the mirrors of a truck in front of me or in a spotter's eyes. The point of the rock lights is to be able to shut off all other lights so as to preserve everyones' night vision and still be able to see for yourself. So, these lights will sit to the side and basically the beams will cross low to the ground in front of the truck.
http://www.amazon.com/gp/product/B00B1OW0IO/ref=oh_details_o01_s00_i00?ie=UTF8&psc=1These lights will actually go right below the rear step on the rear corner plastics. I am going to drill through the bottom of the step and recess these inside to light up the back corners of the truck.
http://www.amazon.com/gp/product/B007PBPI68/ref=oh_details_o00_s00_i00?ie=UTF8&psc=1So, I didn't really conserve cost NEARLY as much as I wanted but hey, might as well have them if I ever need them haha.
Here are pictures:
For the routing of the wire, I basically started at the front driver fender and made a loop ALL the way around the truck along the outline of the frame. From there I cut and soldered into that main wire for each light coming off of it. I ran a hot wire AND a ground wire all the way around so that I could ground all the lights to the blue sea box which I know is grounded properly.
This is cleaner than it looks. This was mid install and I was using a black, brush on sealant to hide the chrome on the lights as well as blend them with the mirror. I will try to take better pictures of this once I get it all cleaned up and blended. Walking by the truck you really can't even see these.
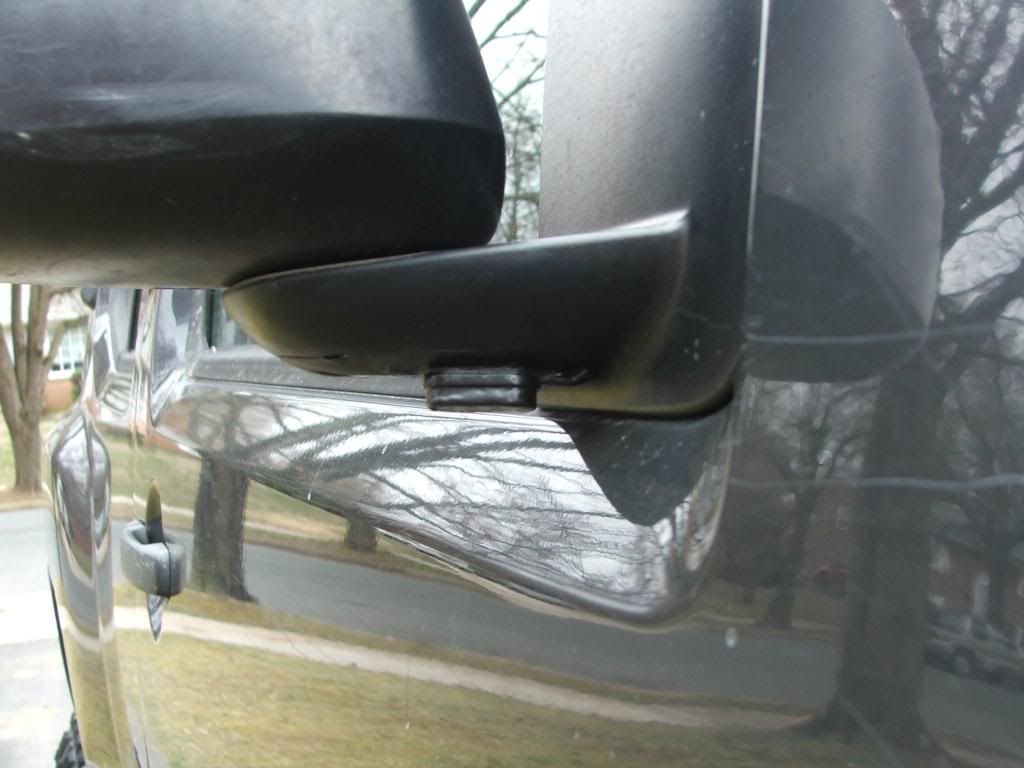
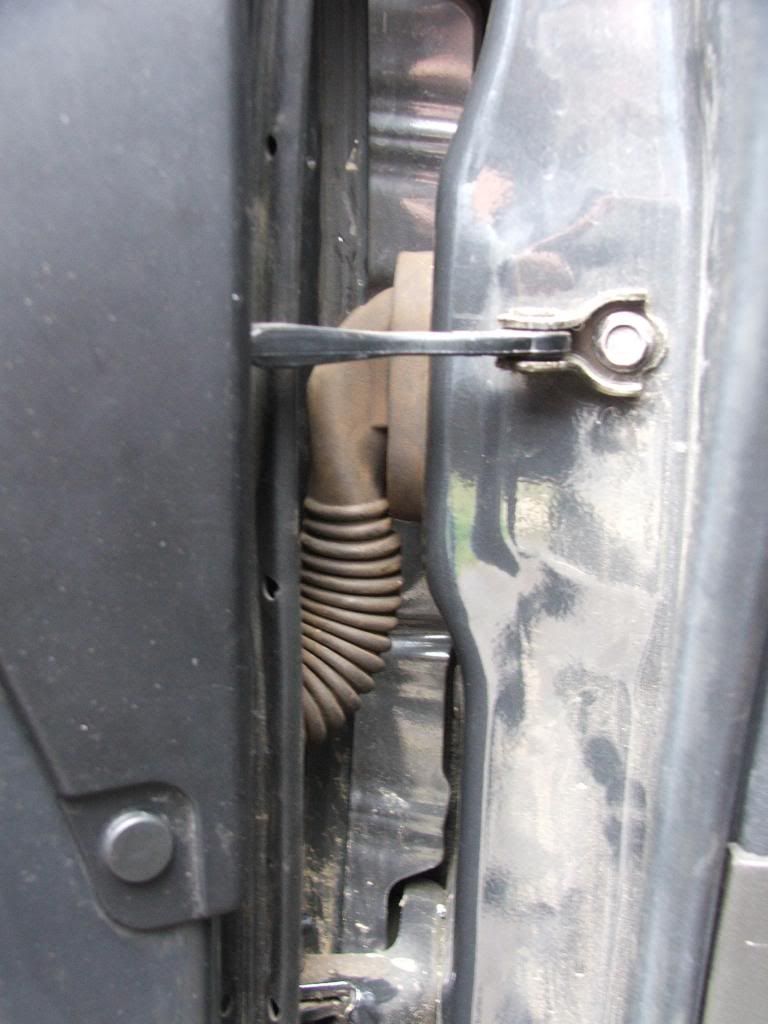
For the wiring for the mirror lights I fished wire through the rubber grommet in the door.
This is a HUGE pain in the ass!
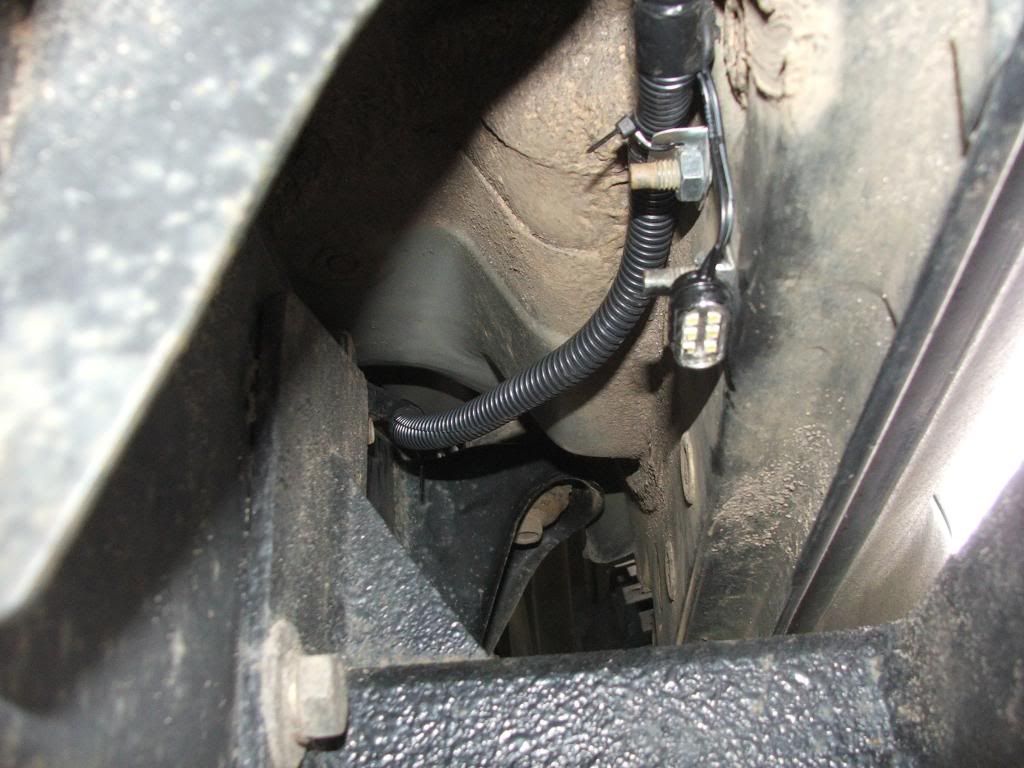
Here is what I have in the front fenders. These have 3M tape on the back. I alcohol swabbed everything but just to be save, I bought a clear Goop and brushed it on over the whole thing. I've had these particular lights on for several months and wheeled with them several times with no issues. I drilled a very small hole through the plastic inner fender liner and just put the wire through there, gooped it up and and now the wires were inside the engine bay for me to tap them into the main wire I have running around the vehicle for all the rock lights.
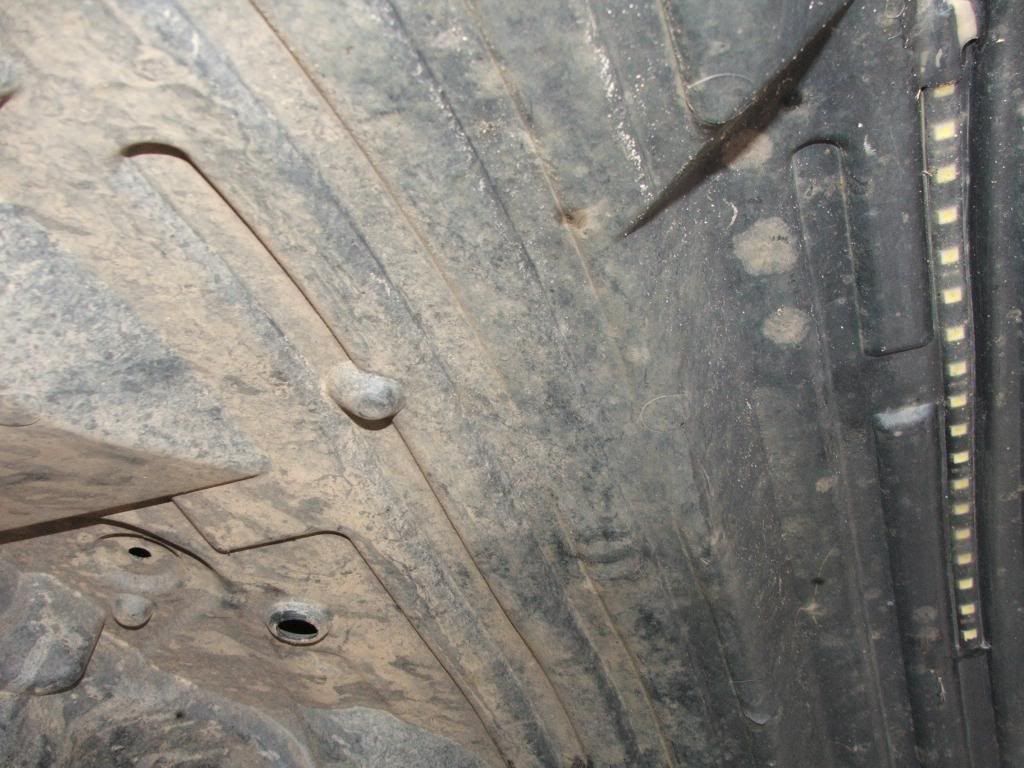
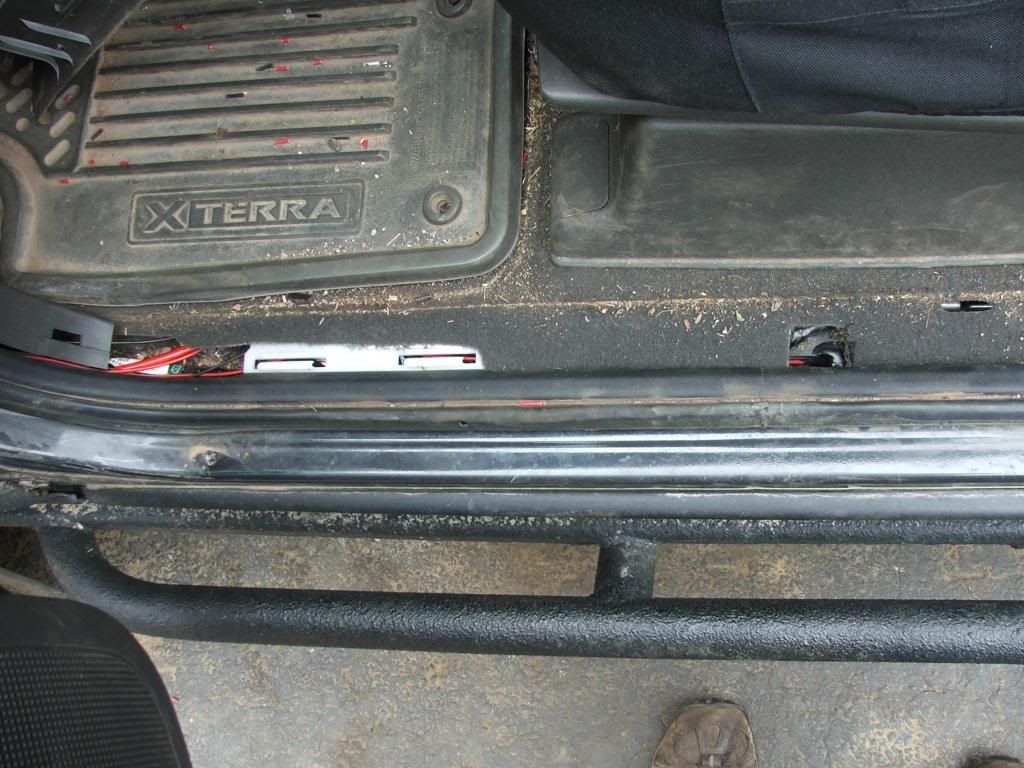
I next installed two of the LED pods along the underside of the body on the same bolts that the stock step rails used to use.
I used some spare tabs to tie the wiring inside the loom up to the second bolt that the stock step rails used.

One thing I did (not sure if I would take the same route again or not) was to come back in from the engine bay so I could tap the wires for the mirrors more easily and then go down through the body right here so that my wires came out right by where the stock step rails used to mount.
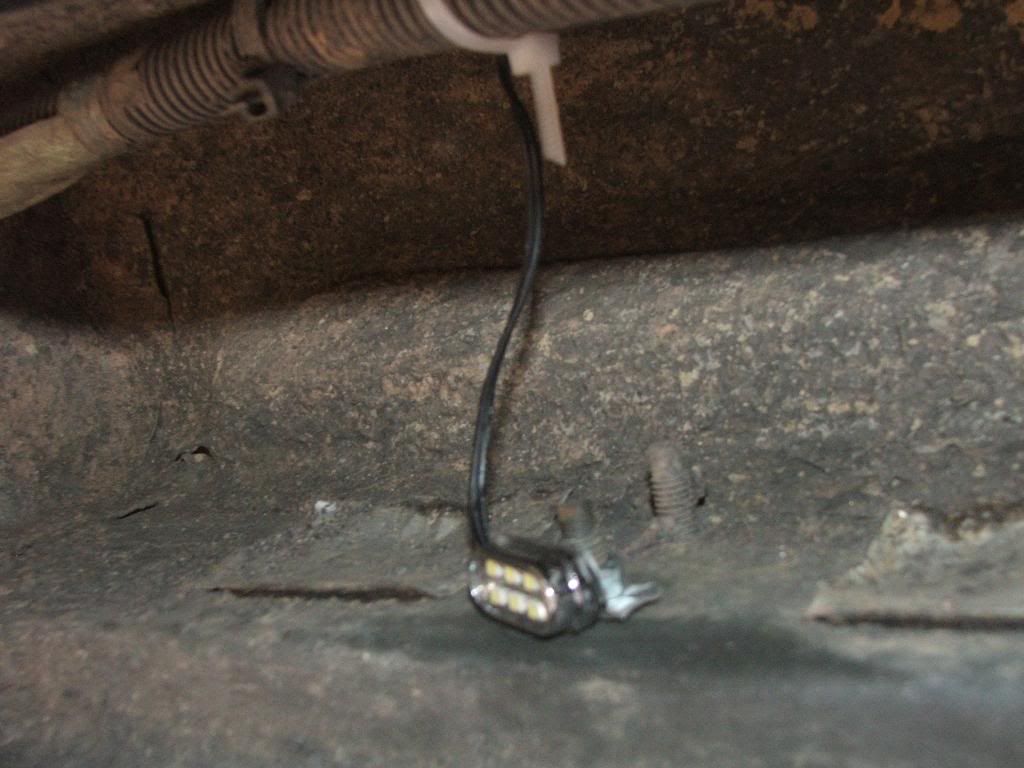
I mounted the two lights in the back right on one of the frame cross bars where the spare tire mounts. (I don't have a spare stored under there so it worked for me) These don't really get light out to the sides of the truck though which is why I ordered the two eagle eye lights I linked earlier. These really just ended up looking like I was trying to make ground effects like a rice rocket or something.
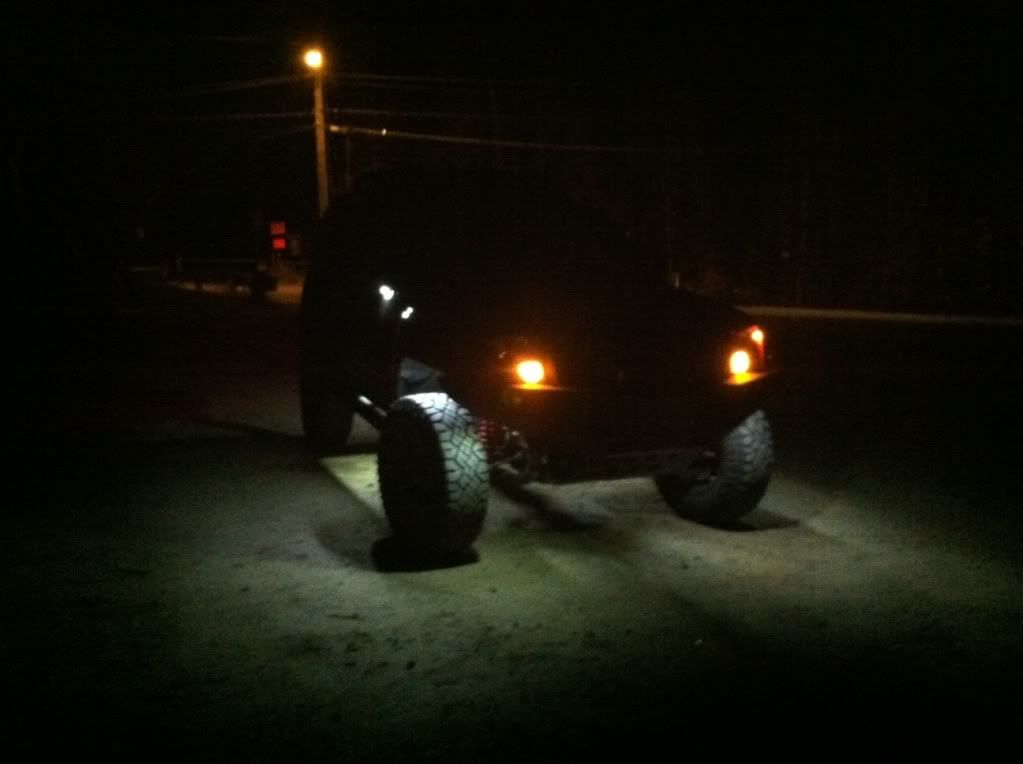
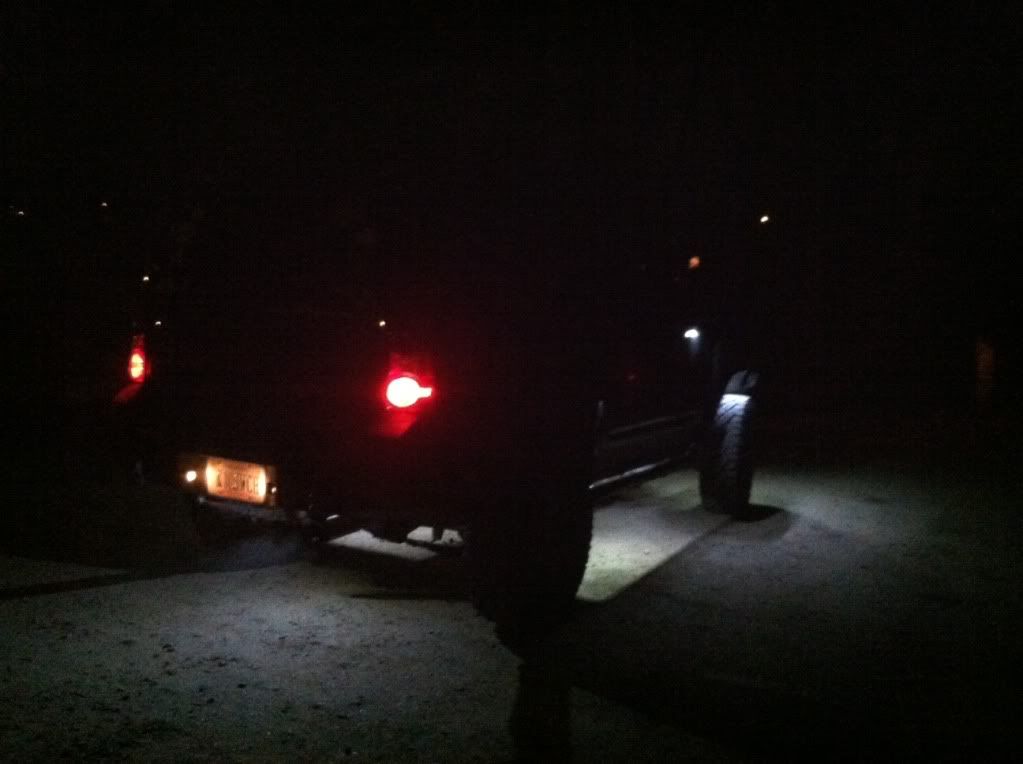
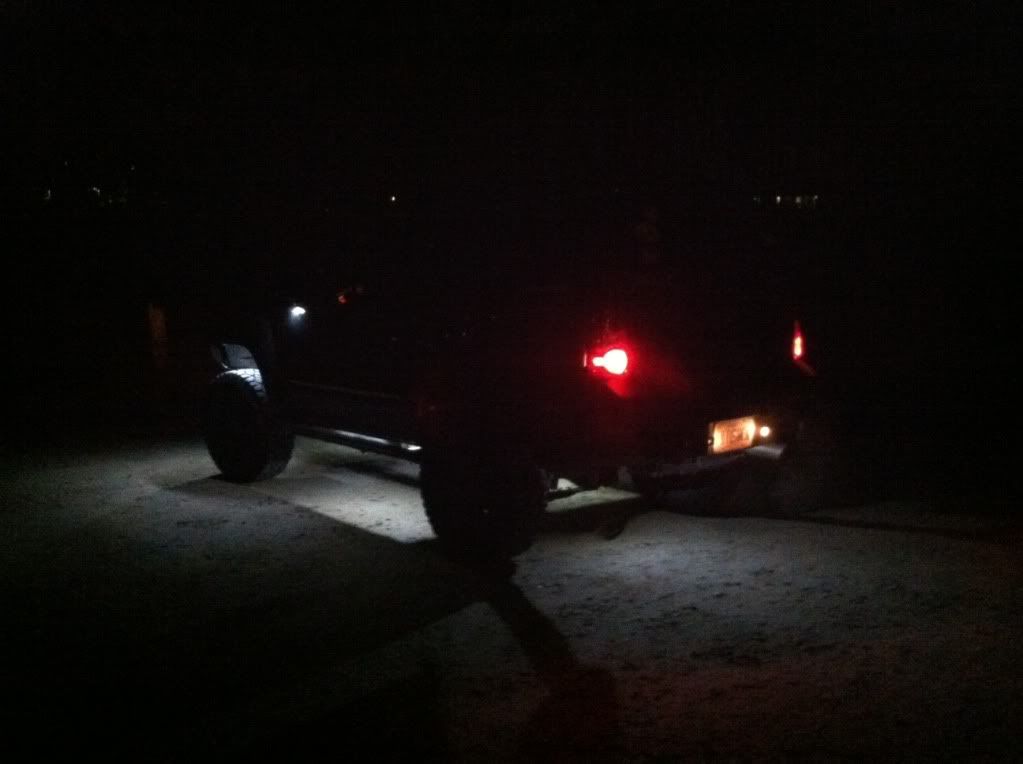
Finally, pictures of the results thus far on the rock lights:
These are not edited to make it look more bright or anything like that. This is actually pretty accurate on the light spread. I snapped these lastnight on my cell phone so they're a little grainy but they do show the light.

Discovered I was missing a marker light

 REVERSE LIGHTS:
Have them sitting around but not installed yet
SIDE LIGHTS:Still need to be ordered
 Board index » Media » Show Your Ride


 Looks good Chris.