Hello everyone. Here is what I hope will be my first installment of a ?How To? series. I?m trying to go a little bit beyond an install and/or review. I?m hoping to provide help for those, like me, that are just beginning, don?t have a lot of tools or experience, etc. Constructive criticism is always welcome. Let me know what you think. Please excuse the pictures as I had to borrow a camera and was finishing this up in high winds and in the dark.
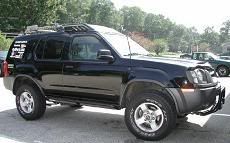
Install of the Rancho Steering Stabilizer on an ?04 Xterra.
After receiving order
-Inventoried parts

(picture used w/ permission from 4x4 parts.com)
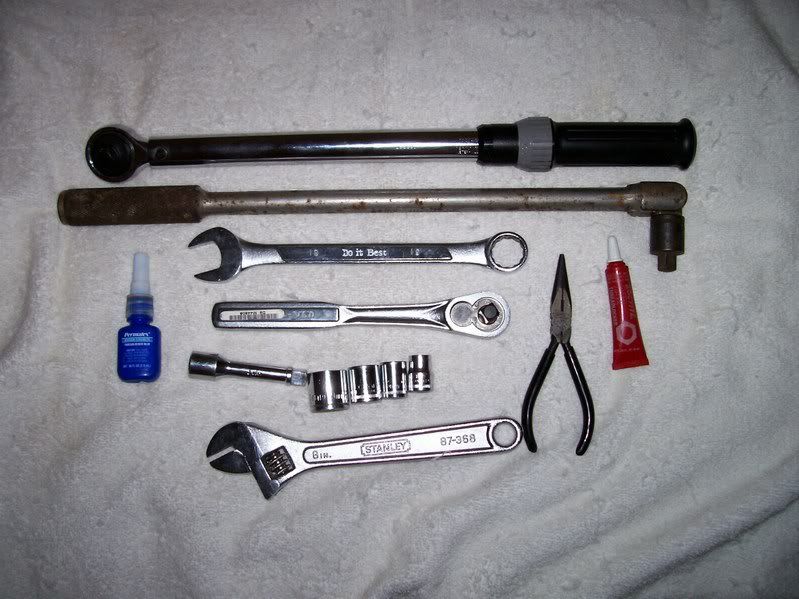
-Tools I had available
- Socket Wrench
- Adjustable wrench
- Assorted combo wrenches. Mainly needed a 19mm and 15mm combo wrench.
- Sockets used: 19mm (steering gear unit bolts), 15mm (nuts to hold stabilizer to brackets), 13mm (tighten nuts on U-bolts to the L-shaped bracket) and 10mm (bolts holding skid plate in place)
-Tools needed or suggested to have on hand
- LOOOONG handled torque wrench, breaker bar or box wrench for steering gear unit bolts! They are very tight at first. The right amount of leverage makes a huge difference!
- Read instructions
- Inspect the area where the parts are to be mounted
- Find the steering gear unit and where bolts go
- I pre-assembled the stabilizer so I knew how it should look when I was under the car
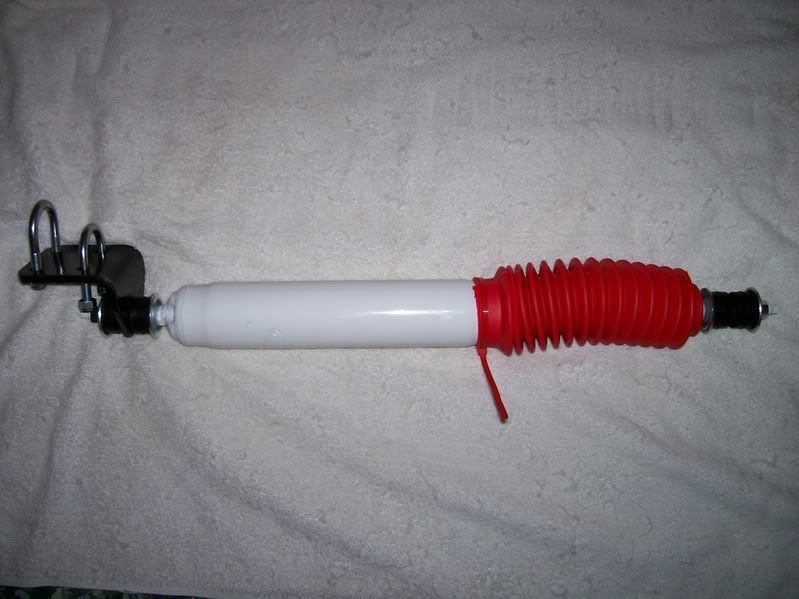
Pre-assembled steering stabilizer
Step 1
-Remove the skid plate and start applying PB Blaster to the steering gear unit bolts to be removed 1 week prior to install. PB Blaster and a long handled breaker bar made loosening the steering gear unit bolts much easier. (19mm combo wrench and socket on breaker bar) As suggested by ?shmittey?, use the socket/breaker bar on the bolt head near the wheel and the combo wrench on the nut, bracing it against the frame. Once loosened, they should be able to be removed very easily. I was actually able to remove these by hand and did not have to bang them out. If you have removed the correct bolts, they should look like these pictured below. MAKE SURE YOU LOOSEN AND REMOVE THE BOLTS THAT ARE CLOSEST TO THE CENTER LINK.
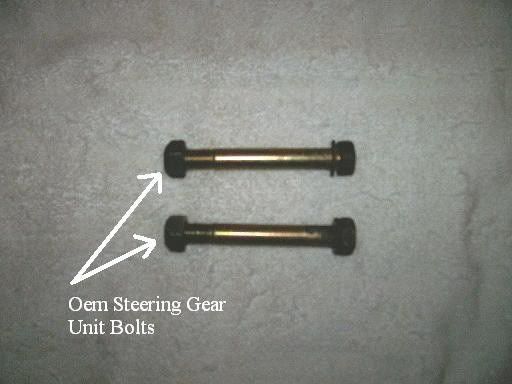
OEM steering gear unit bolts
-Replace the two bolts with the ones provided in the kit. Make sure you have a washer at the bolt head and one on the other side for the nut. The washer goes between the nut and the ?S? shaped bracket and the head of the bolt and the frame.

-Notice that the ?bent in? portion of the bracket is facing towards the PASSENGER side of the vehicle
Step 2
-Place the U bolts around the center link and through the holes in the ?L? shaped bracket. Make sure the flat side of the bracket is pointed towards the passenger side.
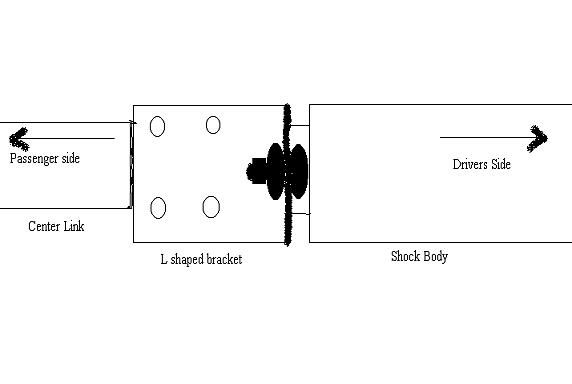
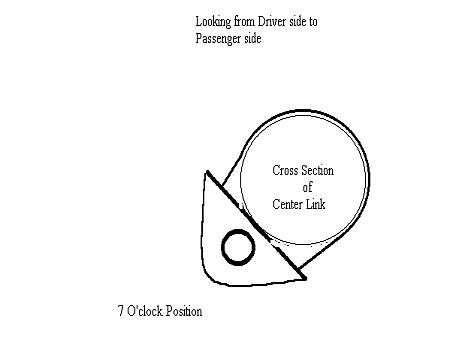
-Hand tighten the bolts on the U brackets enough to hold the L shaped bracket in place but loose enough to move the bracket if you need to. Although the instructions mention this later in the install, I?m mentioning it now. When mounting the L shaped bracket, you want it to be at about the 7 o?clock position on the center link.
-The idea is to help the shock be parallel to the center link. I found it simpler for me to do this now. If you follow the instructions that come with the kit, the result will be the same. Six of one, half dozen of the other?
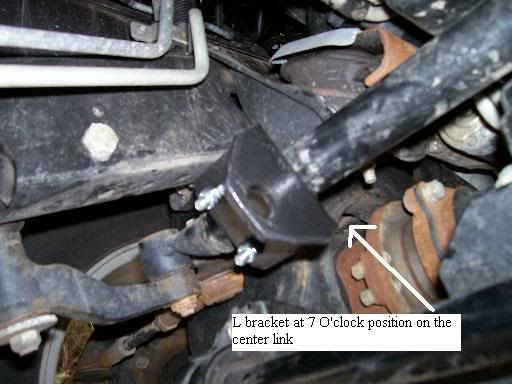
?L? shaped bracket hand tightened and at the 7 o?clock position
Step 3
-Extend the shock and place it with the piston shaft facing the ?S? shaped bracket. Place the end through the remaining hole in the ?S? shaped bracket. The other end of the shock should be placed through the hole of the ?L? shaped bracket. Remember, the nuts on the ?L? shaped bracket should only be hand tight at this point!

Piston mounted to the ?S? shaped bracket

Shock mounted to the ?L? shaped bracket
Step 4
-Turn the steering wheel all the way to the right, towards the passenger side. Extend the shock all the way to its limit. Compress it back in ? of an inch. The ?L? shaped bracket is still only hand tight, right?
Step 5
-Position the ?L? shaped bracket so that the shock is parallel to the center link. (This is where the formal instructions tell you to position the bracket at the 7 o?clock point of the center link. Refer to the diagram above.) Make sure there is plenty of clearance between the shock and the oil filter. Per the instructions, this is very important on V-6 models. Make sure it does not interfere with cross members or binds in any way.
Step 6
-After applying Lock-Tite to all of the threads, fully tighten the ?L? shaped bracket and the ?S? shaped bracket. I don?t know why the instructions say this for the ?S? shaped bracket as it only goes on one way and is not adjustable once it is mounted to the frame. Have someone else turn the wheels slowly to the right and then to the left, stop to stop. Check for proper operation and that the ?L? shaped bracket does not interfere with any components.
Whether you use the shock boot or not is up to you. I?m going to try it for a few weeks and see how it goes. I?ll be inspecting the piston shaft every few days to ensure that it?s not corroding or collecting mud, debris, etc. due to the boot.
If your fairly new to this like me, plan on one hour ?+? for set-up, install and break down. Well, there it is. I hope someone will find this helpful.
Special thanks to Automotive Customizers and ?shmittey? for their help and/or permissions.
I've only had it on for one week but I "feel" that the steering is a little more solid. Not quite so large of a neutral zone in the wheel. It has made a difference as far as constant corrections (less) on the highway, etc. I have to make my "X" a little more trail worthy before I can review the satbilizers performance off road.
Safety first. I made sure I wore eye protection, light gloves, hat (yes clothes) and properly rated floor jack/jackstands!
Update on 2/5//2006- Did my first oil change since the install. While the brackets do keep the stabilizer out of the way to remove the filter, I would still remove it as oil poured out onto it. I have to spend some time this morning wiping it off. My bad .
Barry

 Board index » Tech Talk » Installs/Reviews